Learn how to implement Lambda versioning with aliases and manage multiple environments in AWS API Gateway.
The Problemh2
You’ve built an API using API Gateway and Lambda functions, but you need to make changes. However, deploying directly to production is risky - what if there’s a bug or the new version breaks existing functionality?
Deploying directly to production can break your users’ experience and make rollbacks complex.
This guide shows you how to set up multiple environments (dev, staging, production) for safe deployments without breaking production.
What We’ll Coverh2
We’ll set up three environments: Development Staging Production
- Lambda Versioning & Aliases: Create stable environments for safe deployments
- API Gateway Stages: Connect each stage to the appropriate Lambda alias
Let’s Starth2
Our Current Setuph3
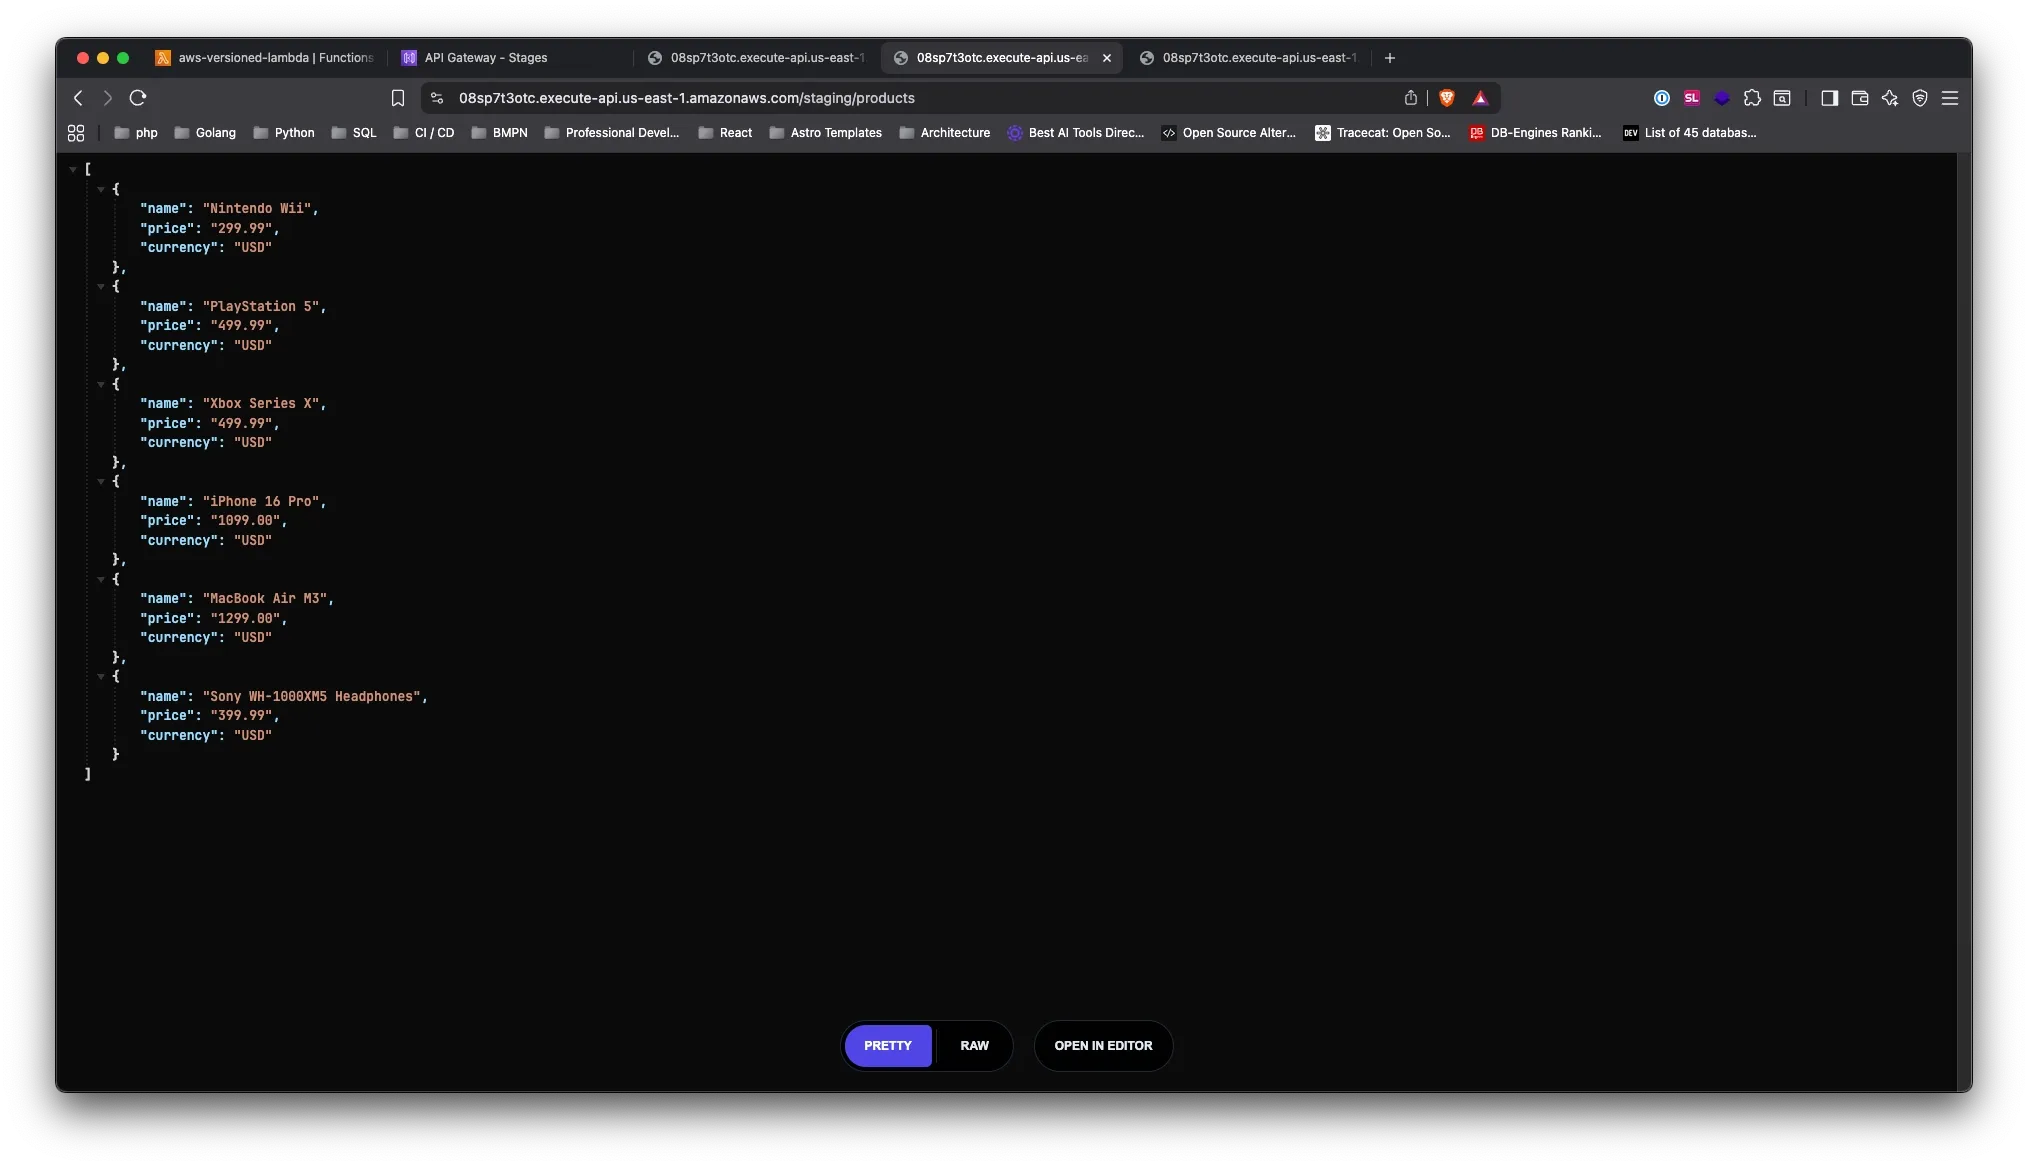
Currently, we have an API Gateway with a /products endpoint that uses a GET method connected to our Lambda function called “aws-versioned-lambda”. This endpoint returns all our available products with the following structure:
[ { "name": "Nintendo Wii", "price": "299.99", "currency": "USD" }, { "name": "PlayStation 5", "price": "499.99", "currency": "USD" }, { "name": "iPhone 16 Pro", "price": "1099.00", "currency": "USD" }]This API is currently serving production traffic and our users depend on this exact structure.
The Challengeh3
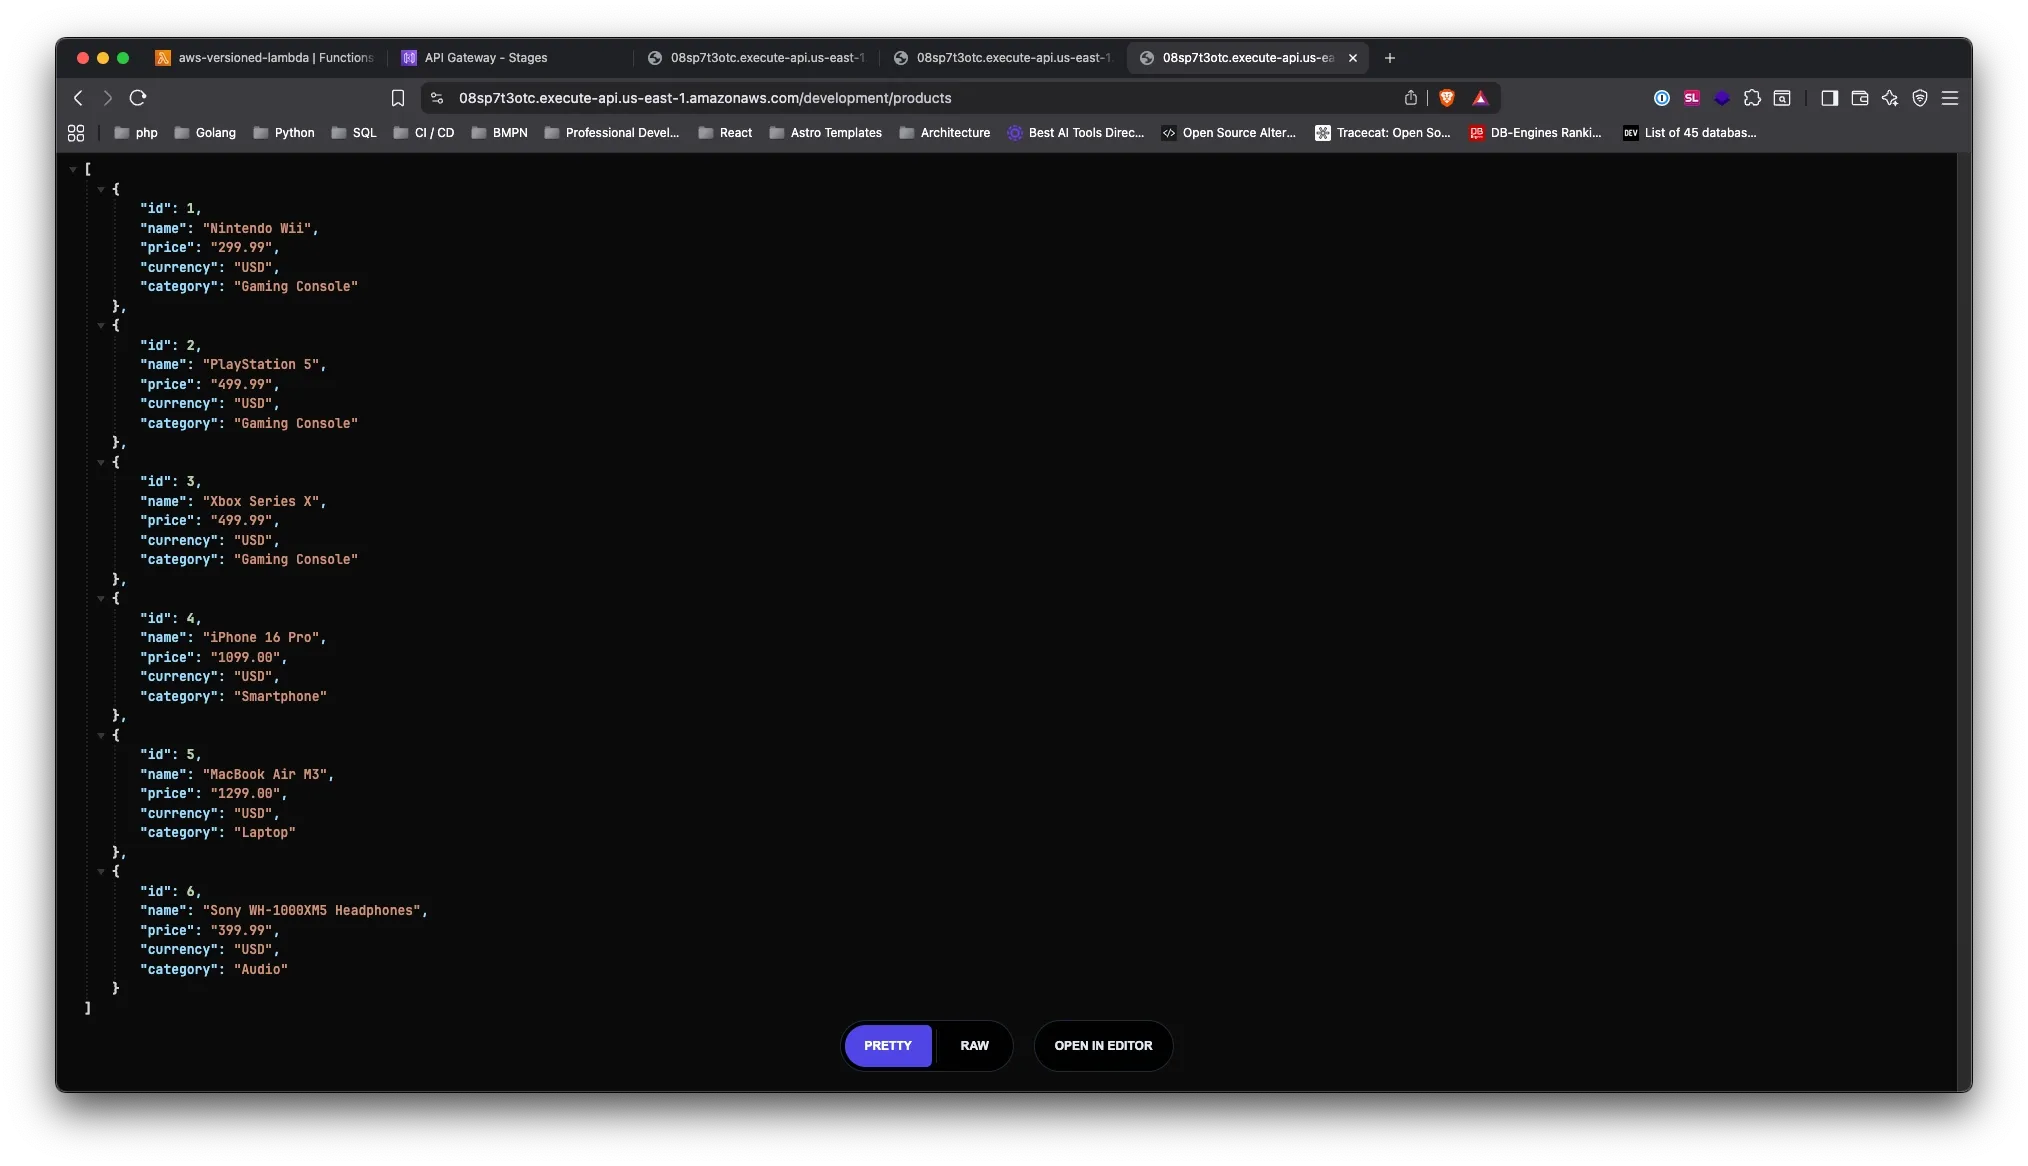
But what if we want to add new properties to our product response? For example:
[ { "id": 1, "name": "Nintendo Wii", "price": "299.99", "currency": "USD", "category": "Gaming", "description": "Classic gaming console with motion controls" }]If we deploy these changes directly to production, we risk:
- Breaking existing client applications that don’t expect new fields
- Introducing bugs that affect all users simultaneously
- Having no easy way to rollback if something goes wrong
This is exactly why we need multiple environments and versioning strategies.
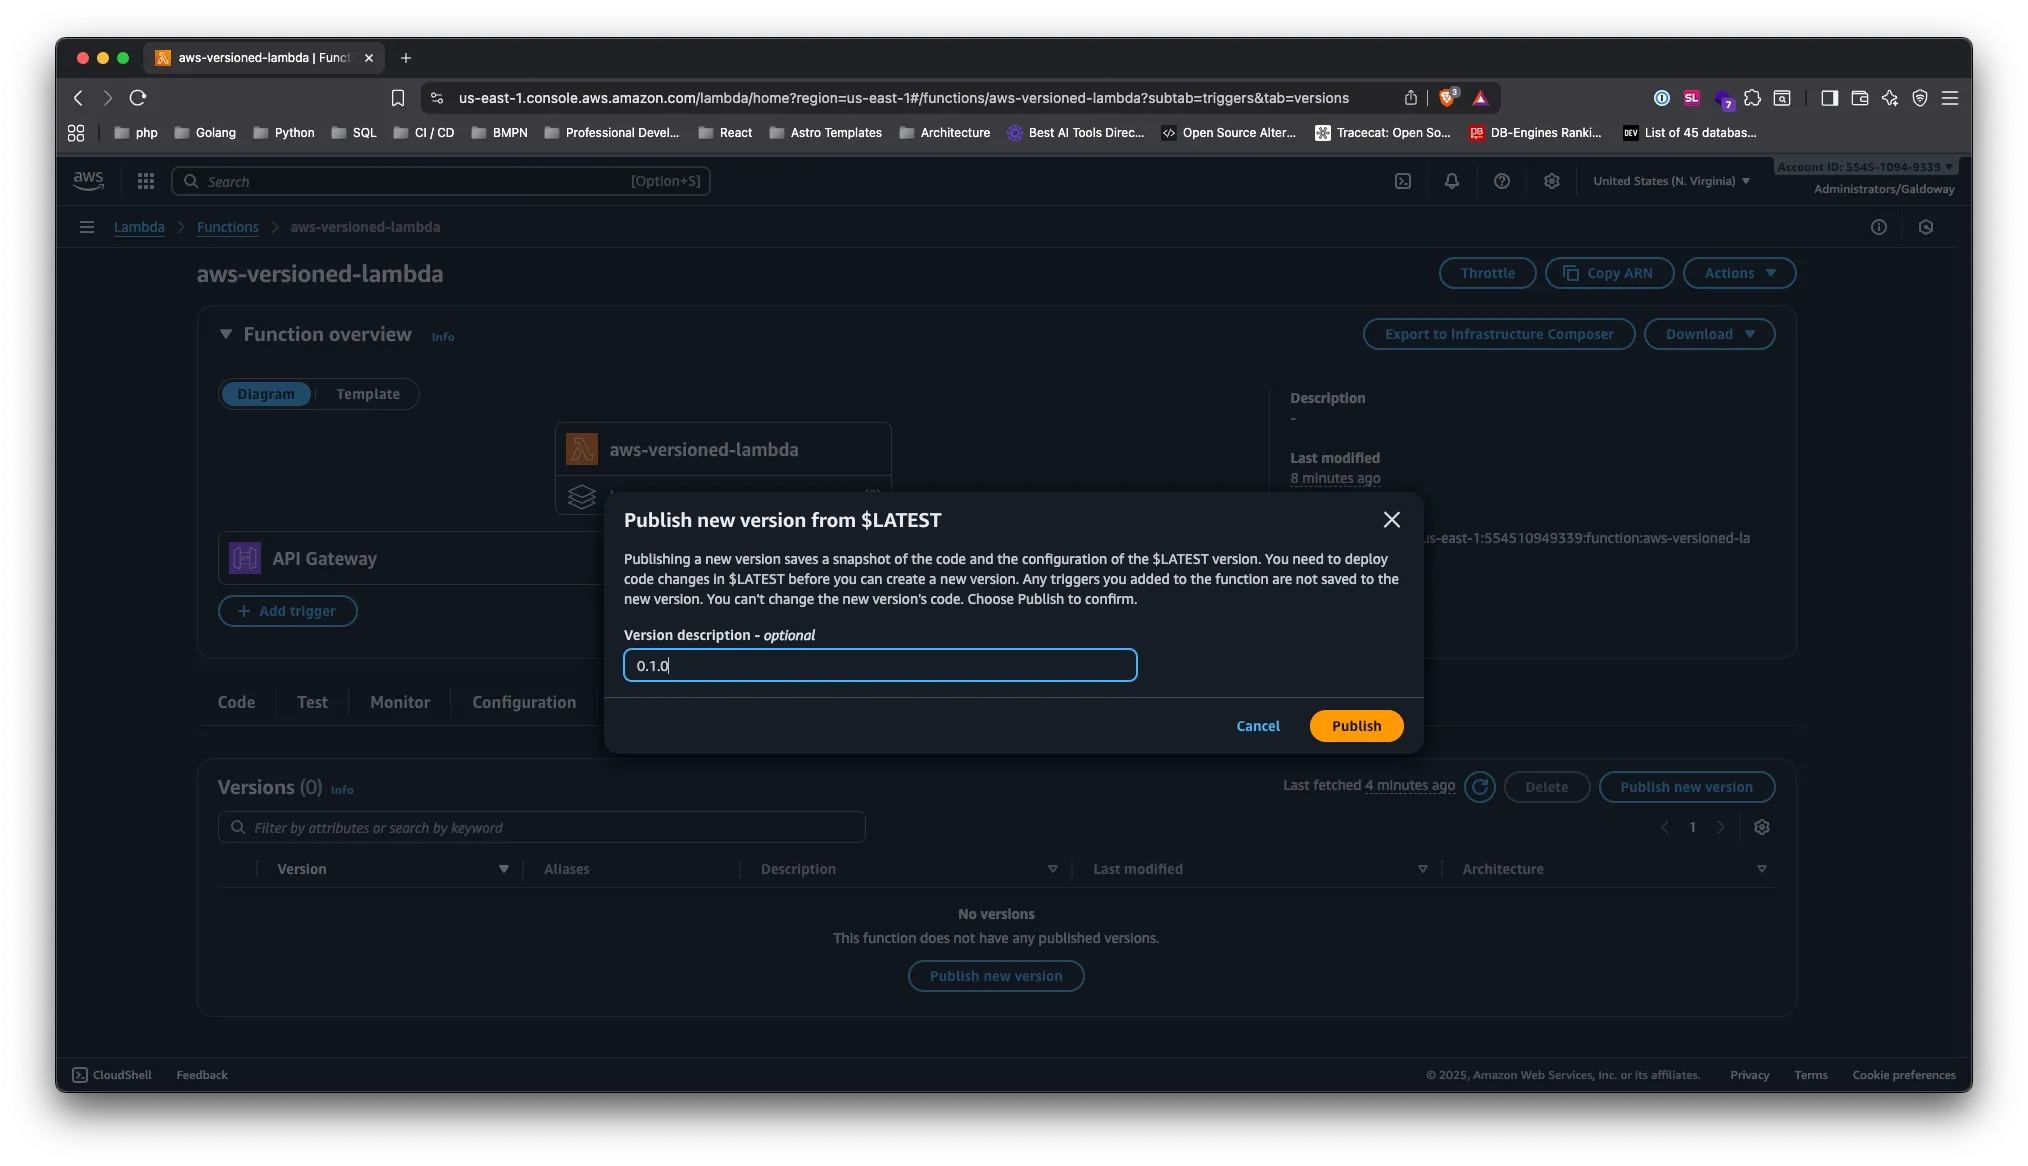
Step 1: Create Your First Lambda Versionh2
First, locate your Lambda function (aws-versioned-lambda) in the AWS Console and navigate to the versions section.
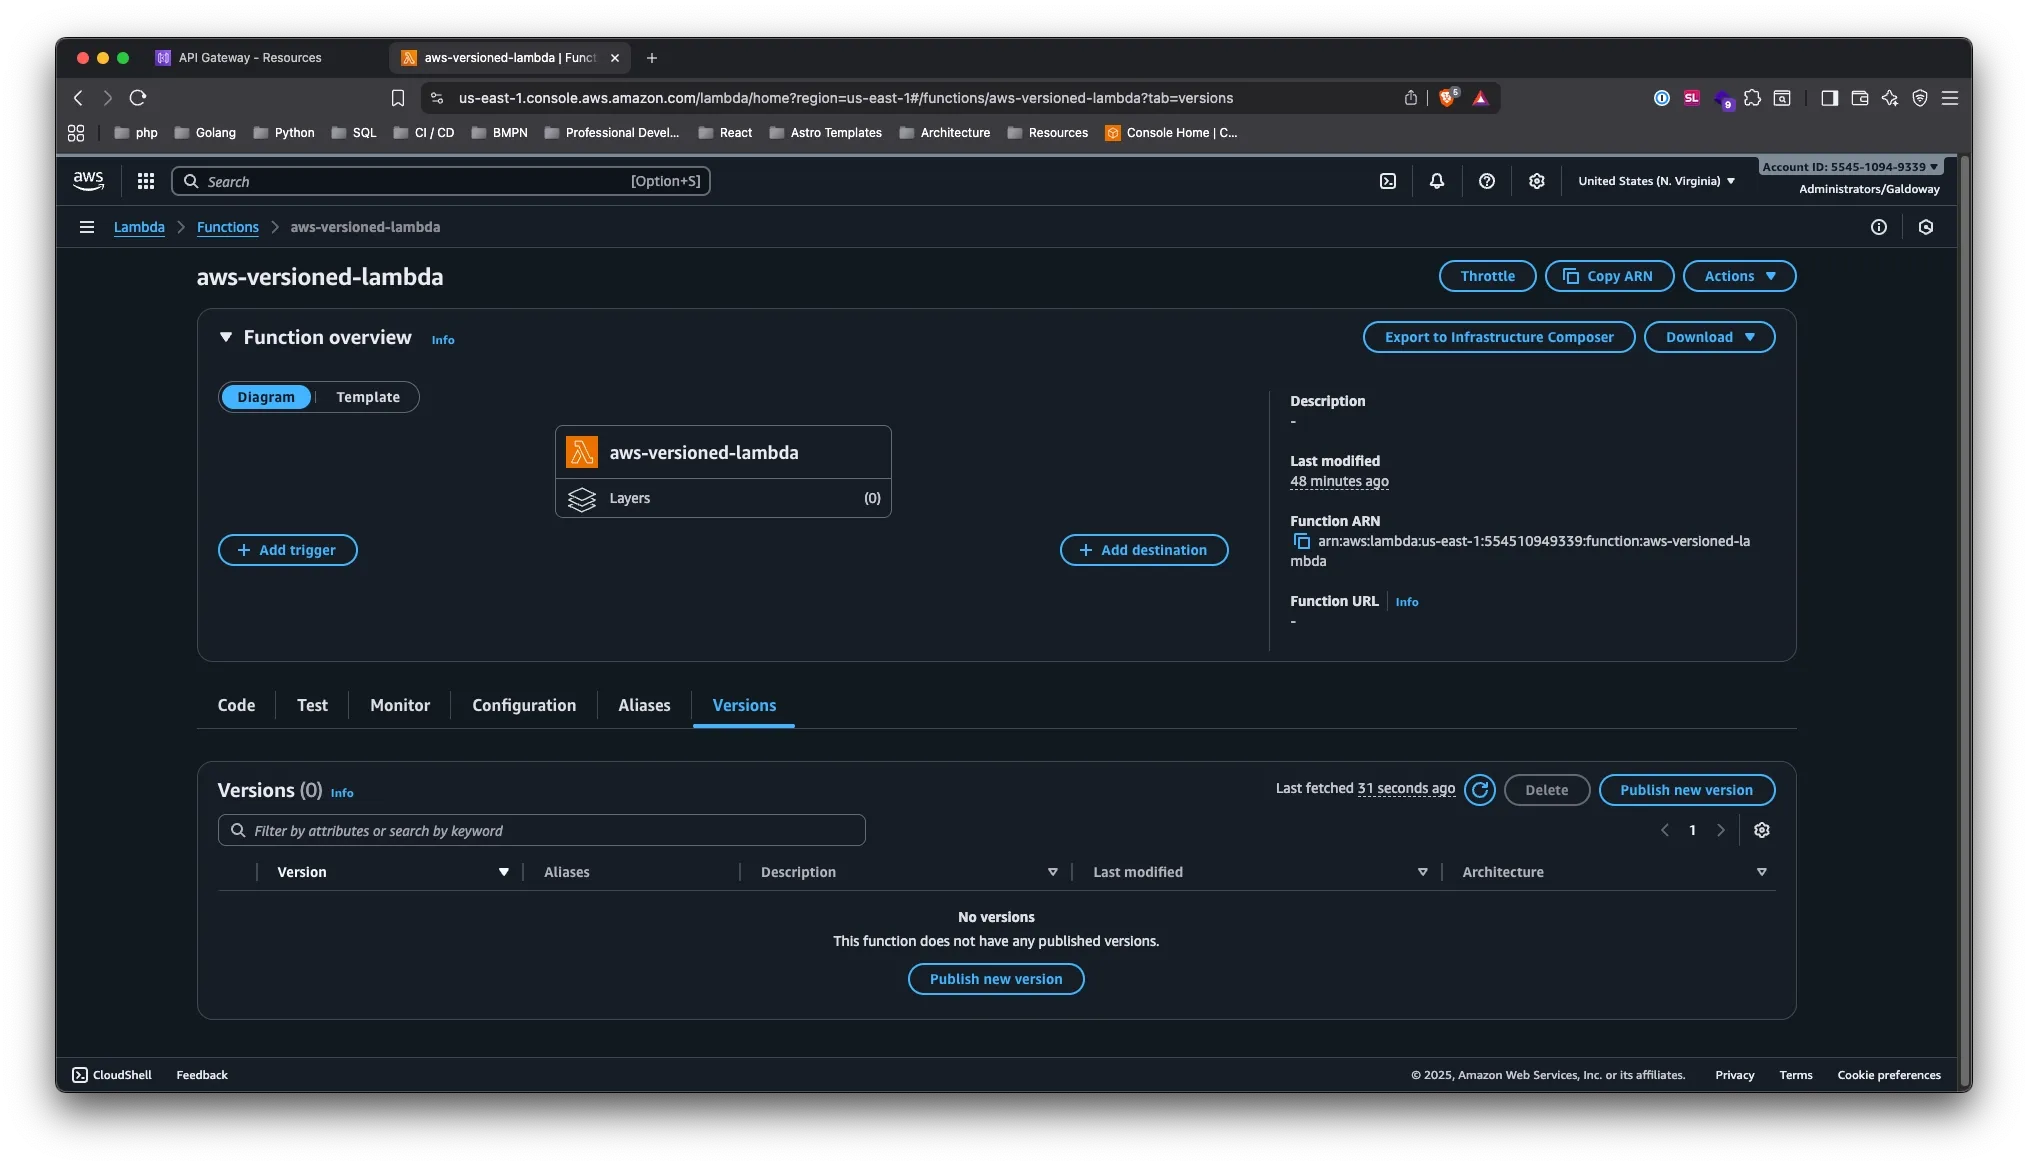
Publish your first version with a description. Versions save your code at a specific point in time - think of them as snapshots.
Step 2: Create Lambda Aliasesh2
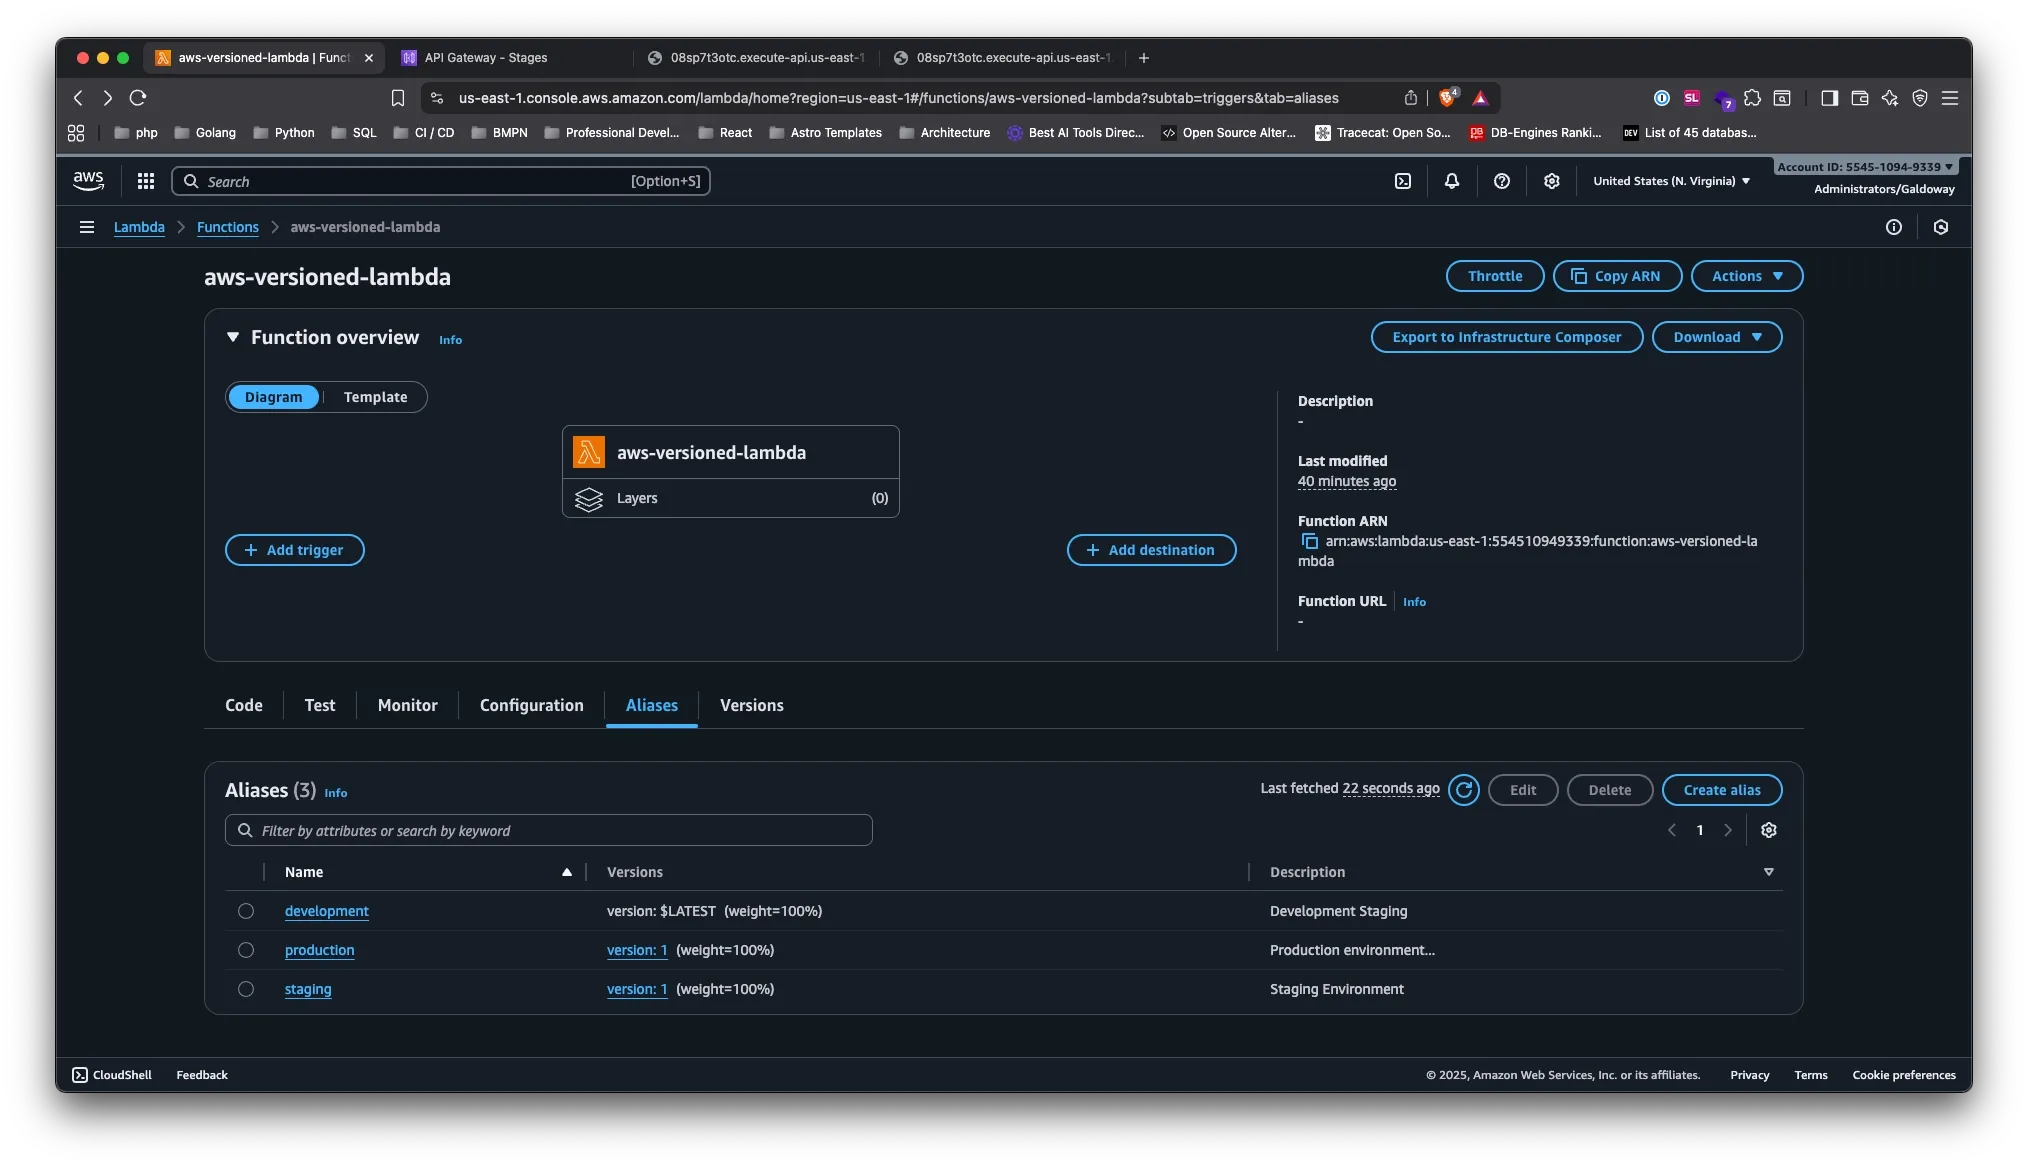
Create 3 aliases: development, staging, and production.
Aliases provide:
- Stable endpoints that don’t change when you update versions
- Environment separation - each points to different versions
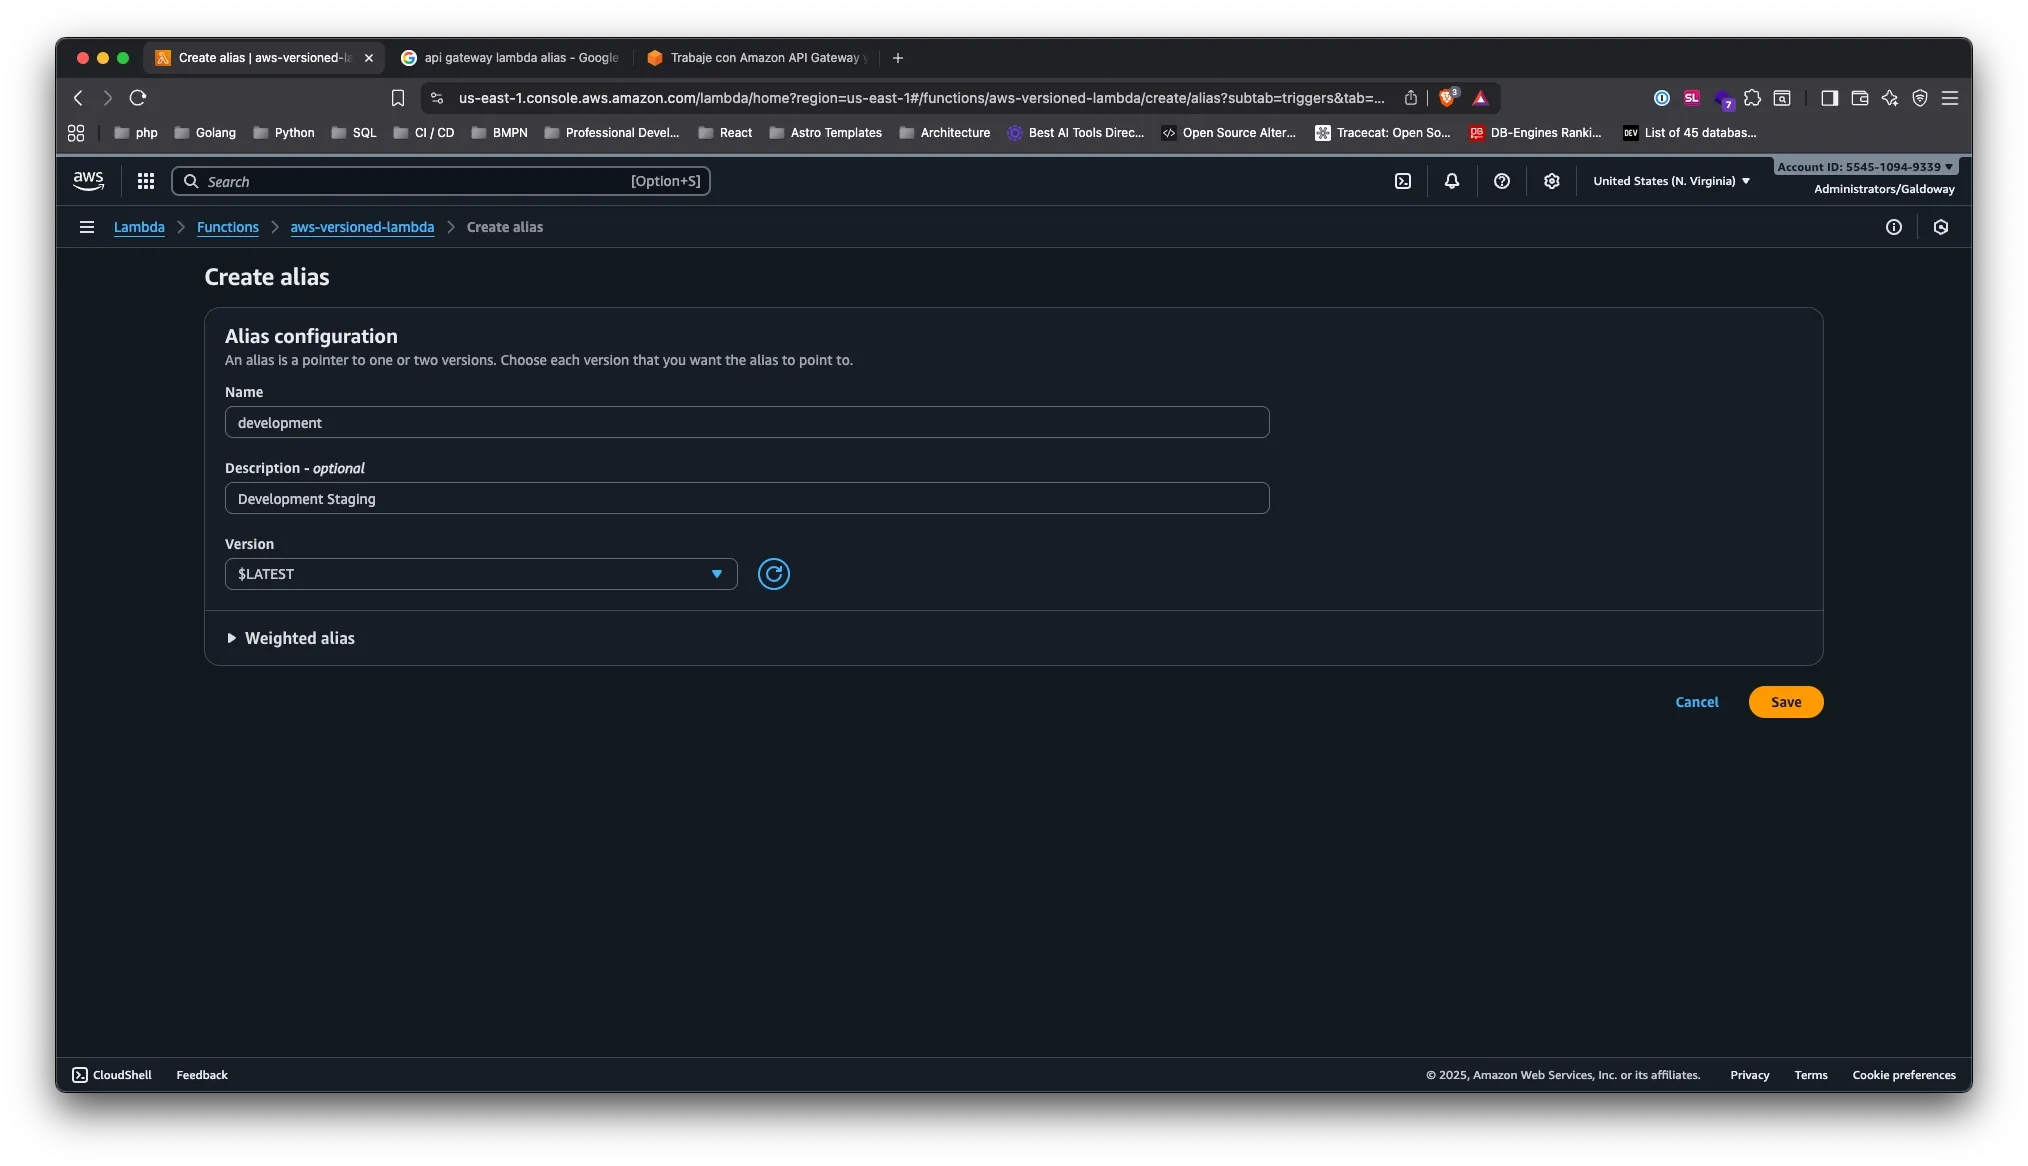
Version Strategy:
- Development: Use
$LATESTfor immediate testing - Staging & Production: Use specific versions for stability
Development gets changes instantly, while staging and production stay stable until you manually update them.
This is how all our created aliases look:
Step 3: Configuring API Gatewayh2
Once we’ve created our aliases and versions, we’ll navigate to our API Gateway that uses our Lambda function and make a few changes.
In this case, our API is called aws-versioned-api-gateway. As I mentioned earlier, this API Gateway only has one endpoint that consumes our Lambda function.
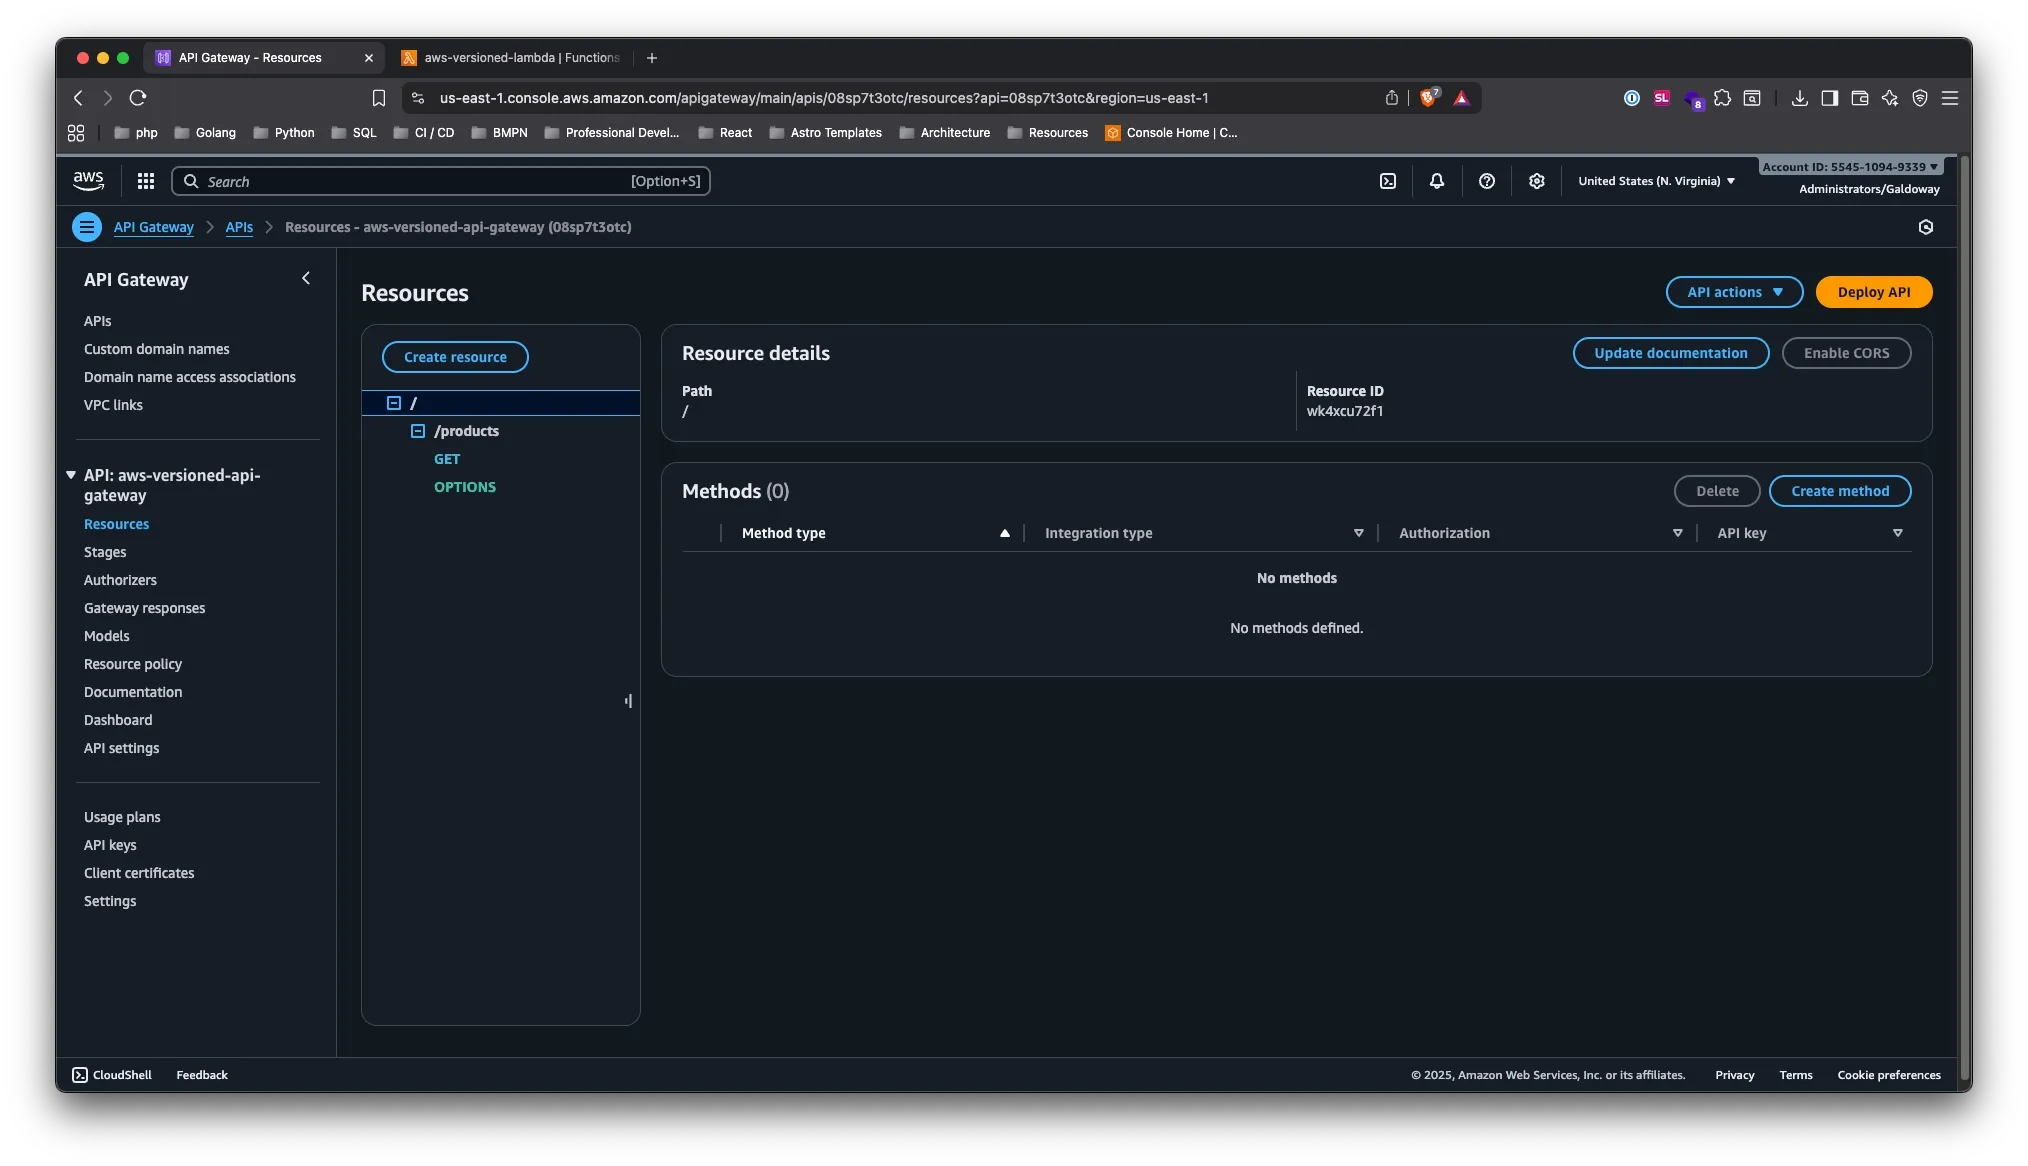
Modify the Method Configurationh3
Recreate your GET method. When selecting the Lambda function, use:
aws-versioned-lambda:${stageVariables.environment}
You can use any variable name (like stageVariables.lambdaAlias) as long as it matches what you define in your stages.

Set Lambda Permissionsh3
AWS will warn you about stage variables. Run this command for each environment:
aws lambda add-permission \--function-name "arn:aws:lambda:REGION:ACCOUNT:function:aws-versioned-lambda:ENVIRONMENT" \--source-arn "arn:aws:execute-api:REGION:ACCOUNT:API-ID/*/GET/products" \--principal apigateway.amazonaws.com \--statement-id unique-id \--action lambda:InvokeFunctionReplace ENVIRONMENT with development, staging, or production for each command.
Step 4: Create API Gateway Stagesh2
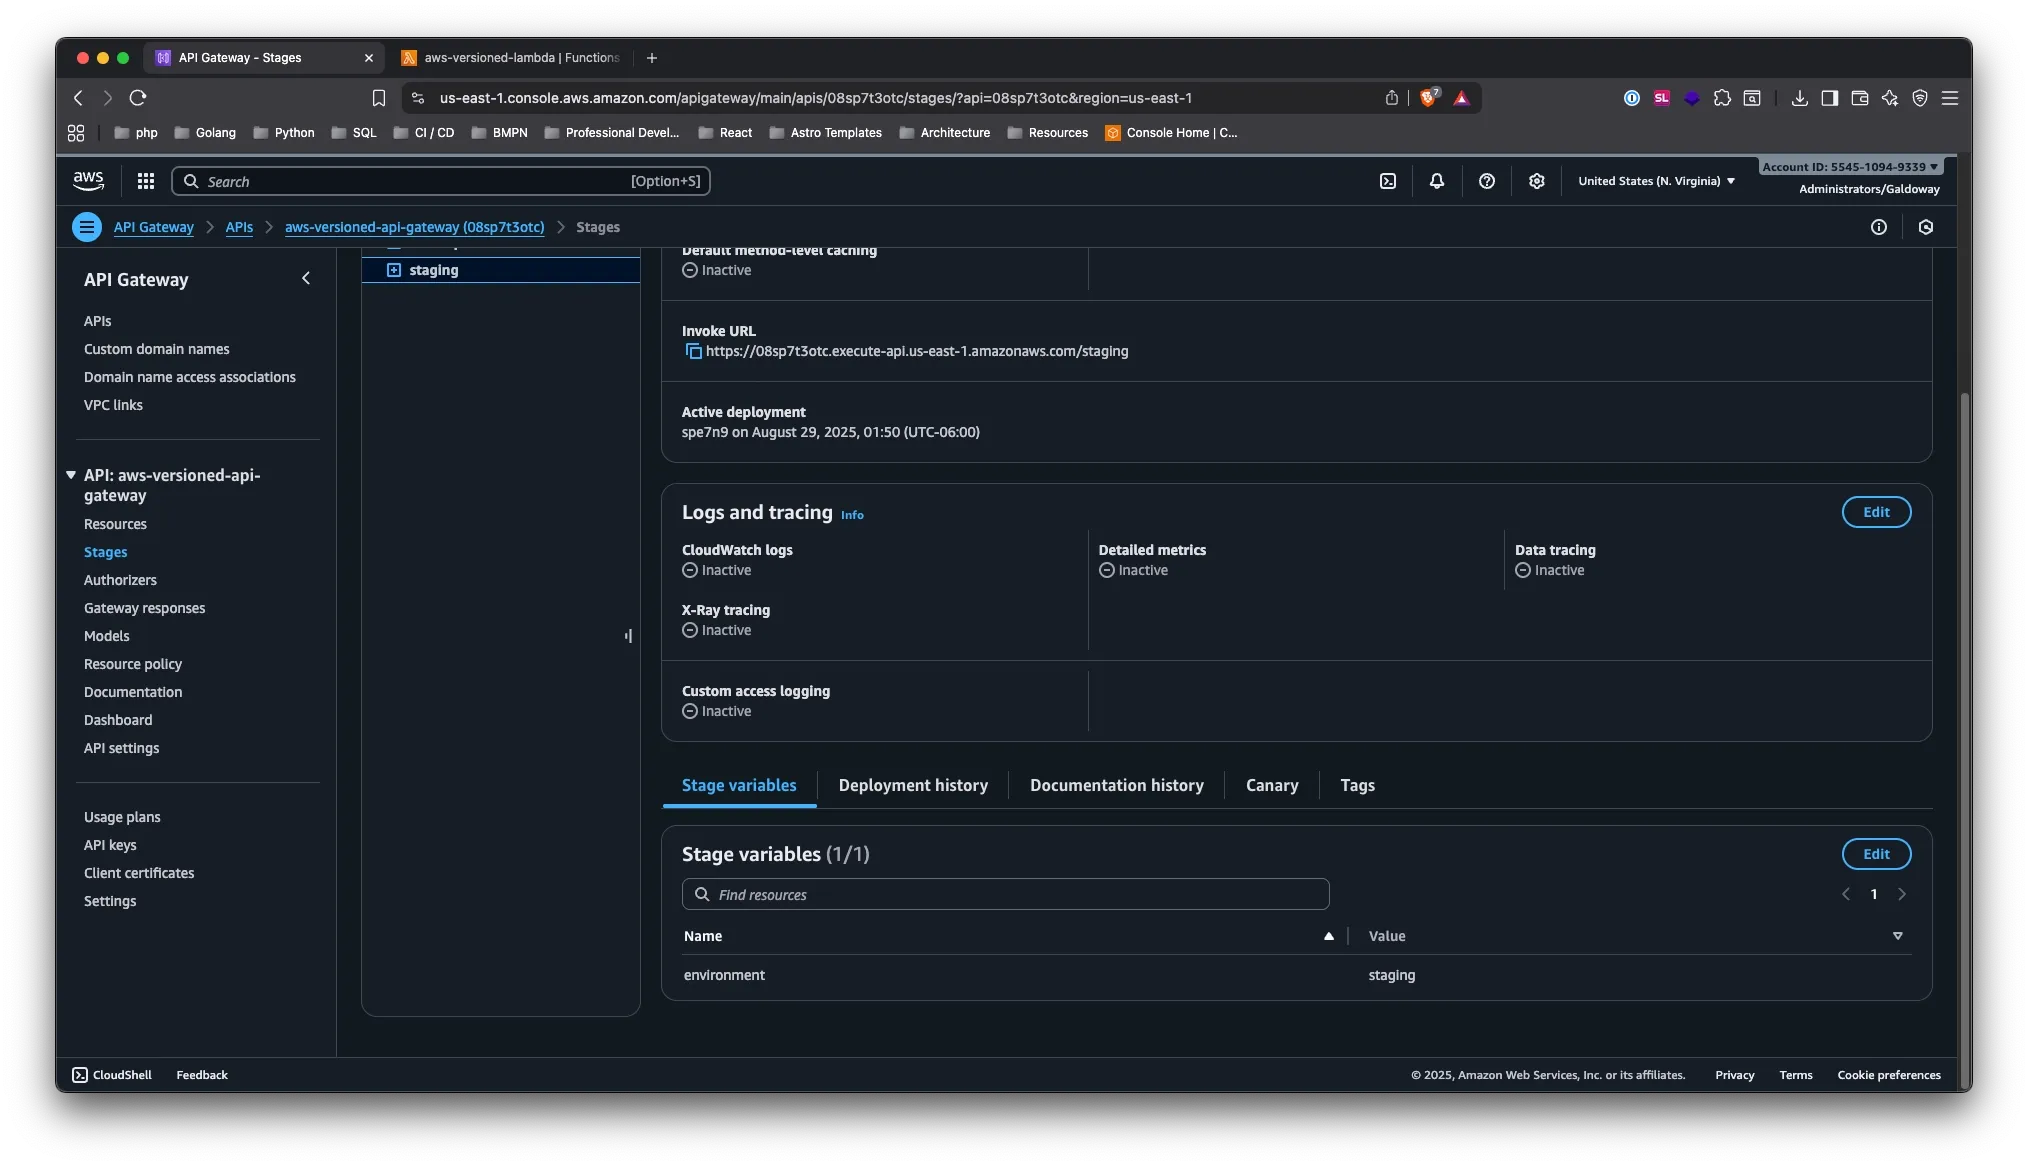
Create your stages (development, staging, production) and configure stage variables.
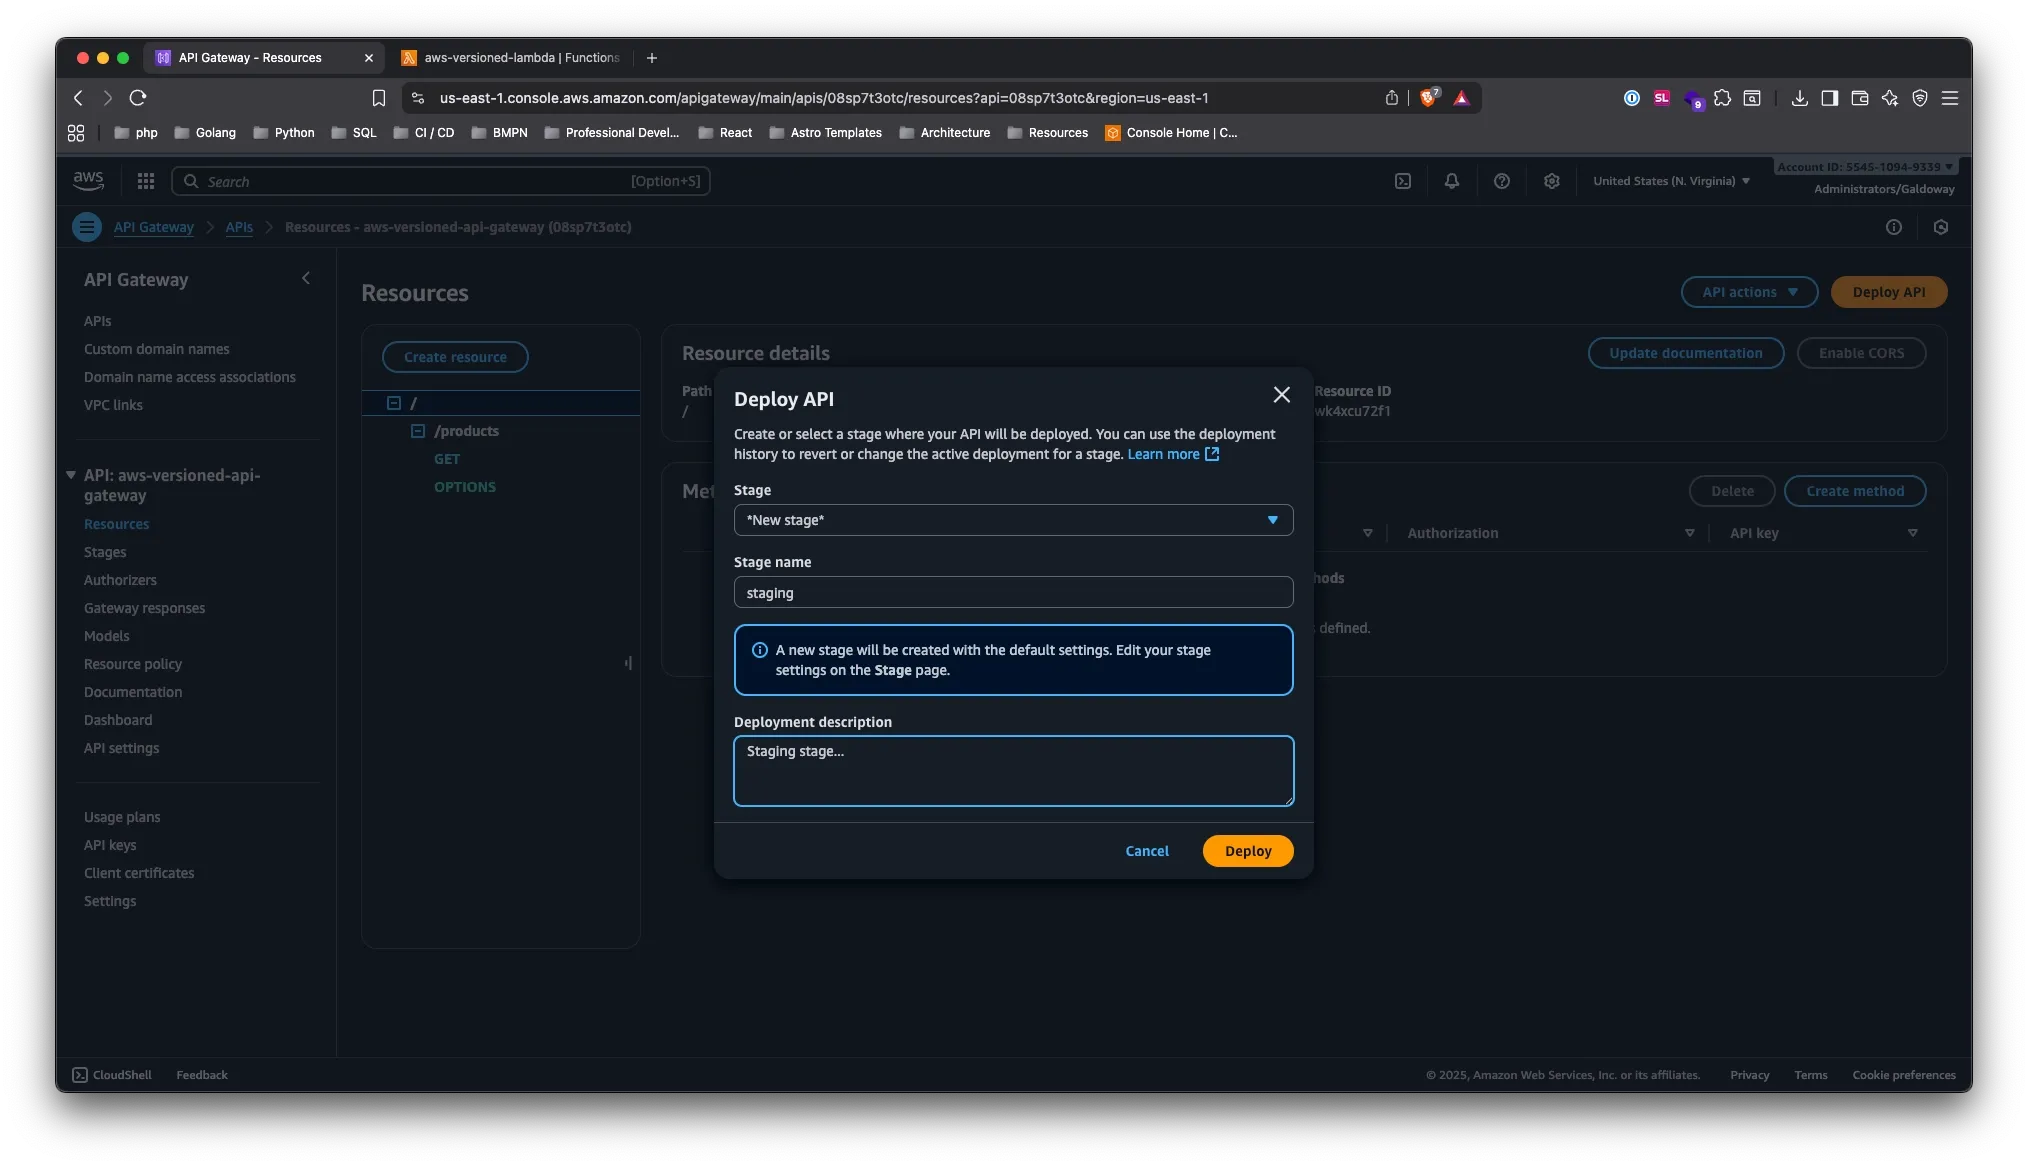
Configure Stage Variables (Critical Step)h3
For each stage, add the environment variable:
- Production stage:
environment=production - Staging stage:
environment=staging - Development stage:
environment=development
These values MUST match your Lambda aliases exactly, or the function will fail!
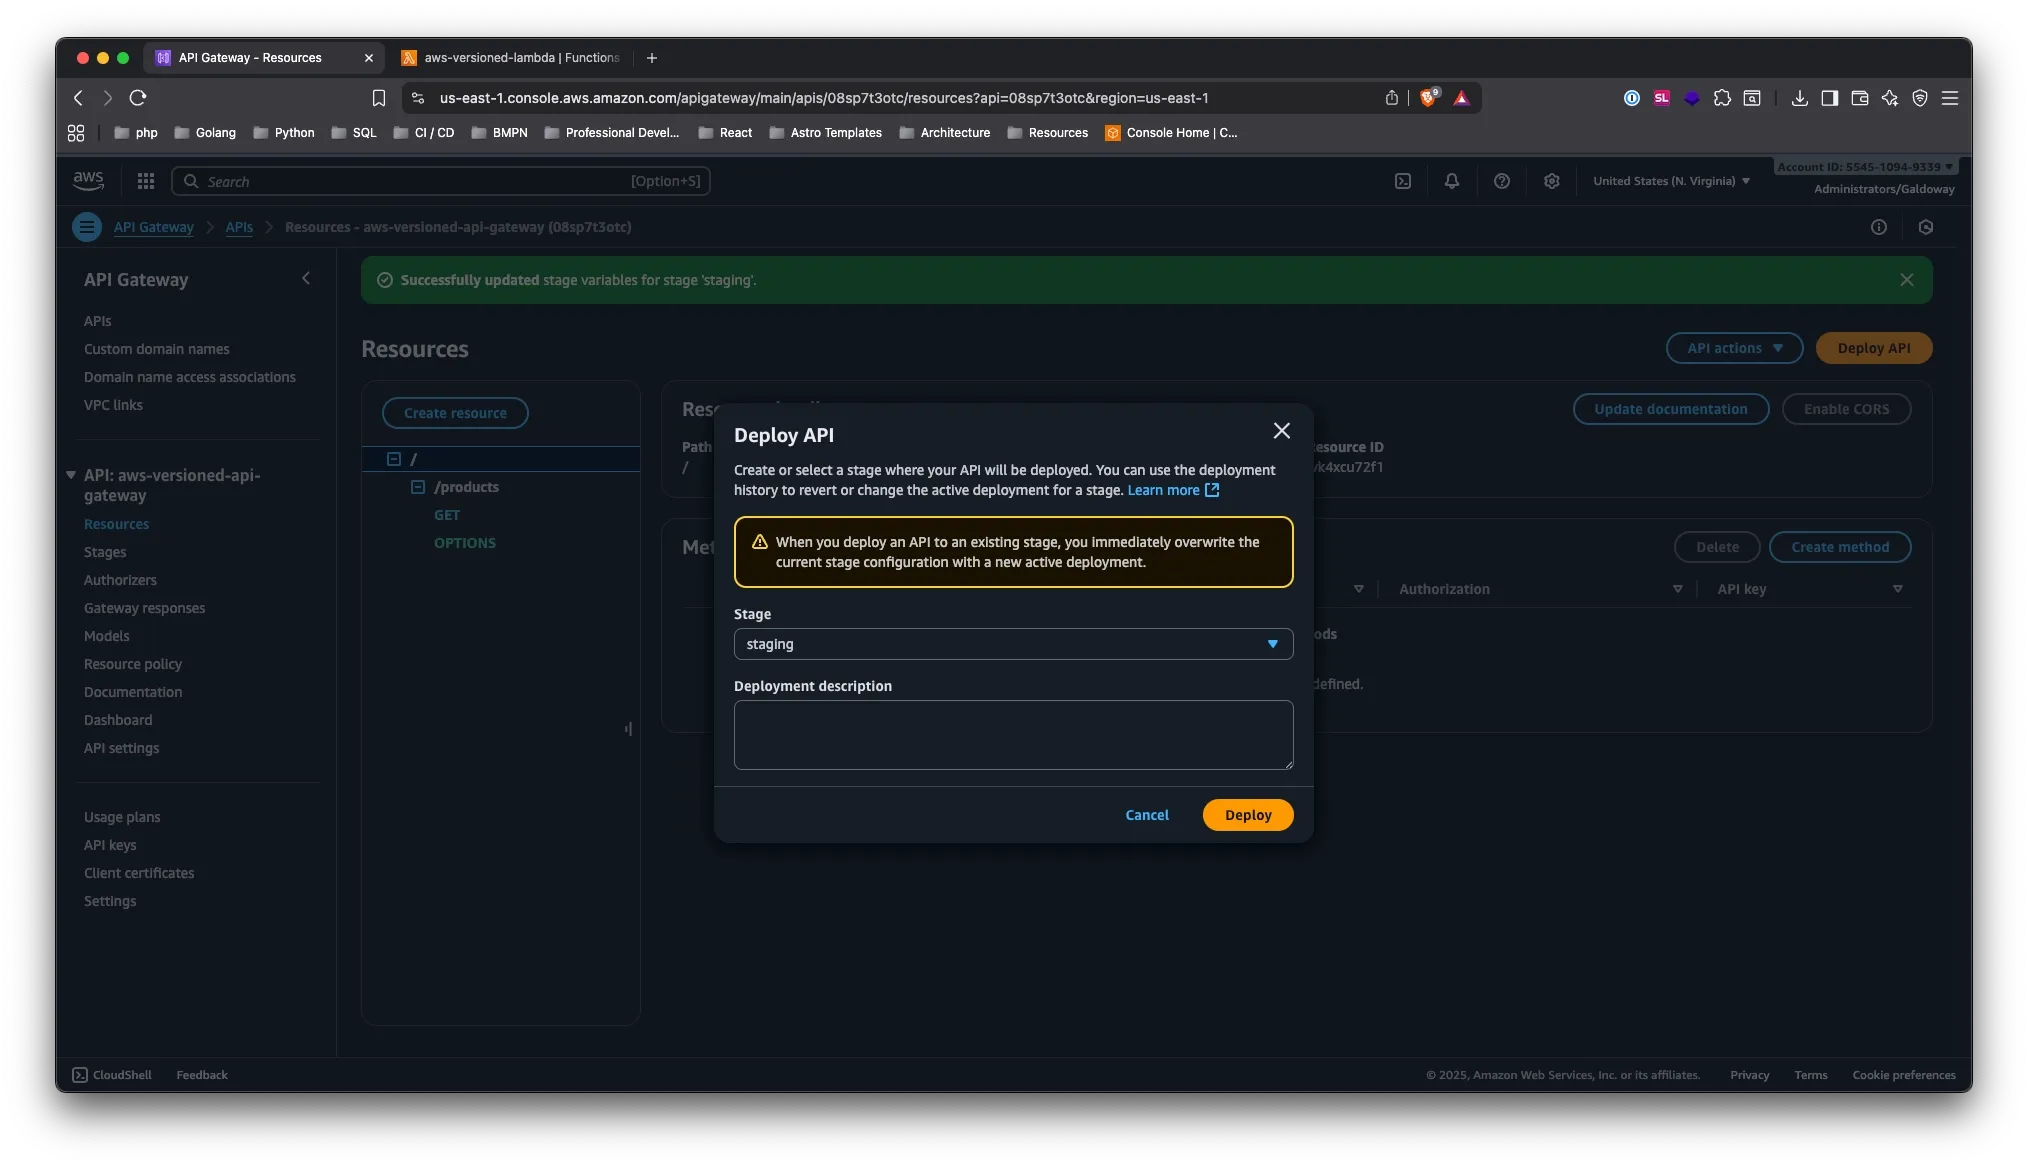
Step 5: Deploy Your APIh2
Once everything is configured, we deploy our APIs to each environment and wait for these changes to take effect.
Testing Our Setuph2
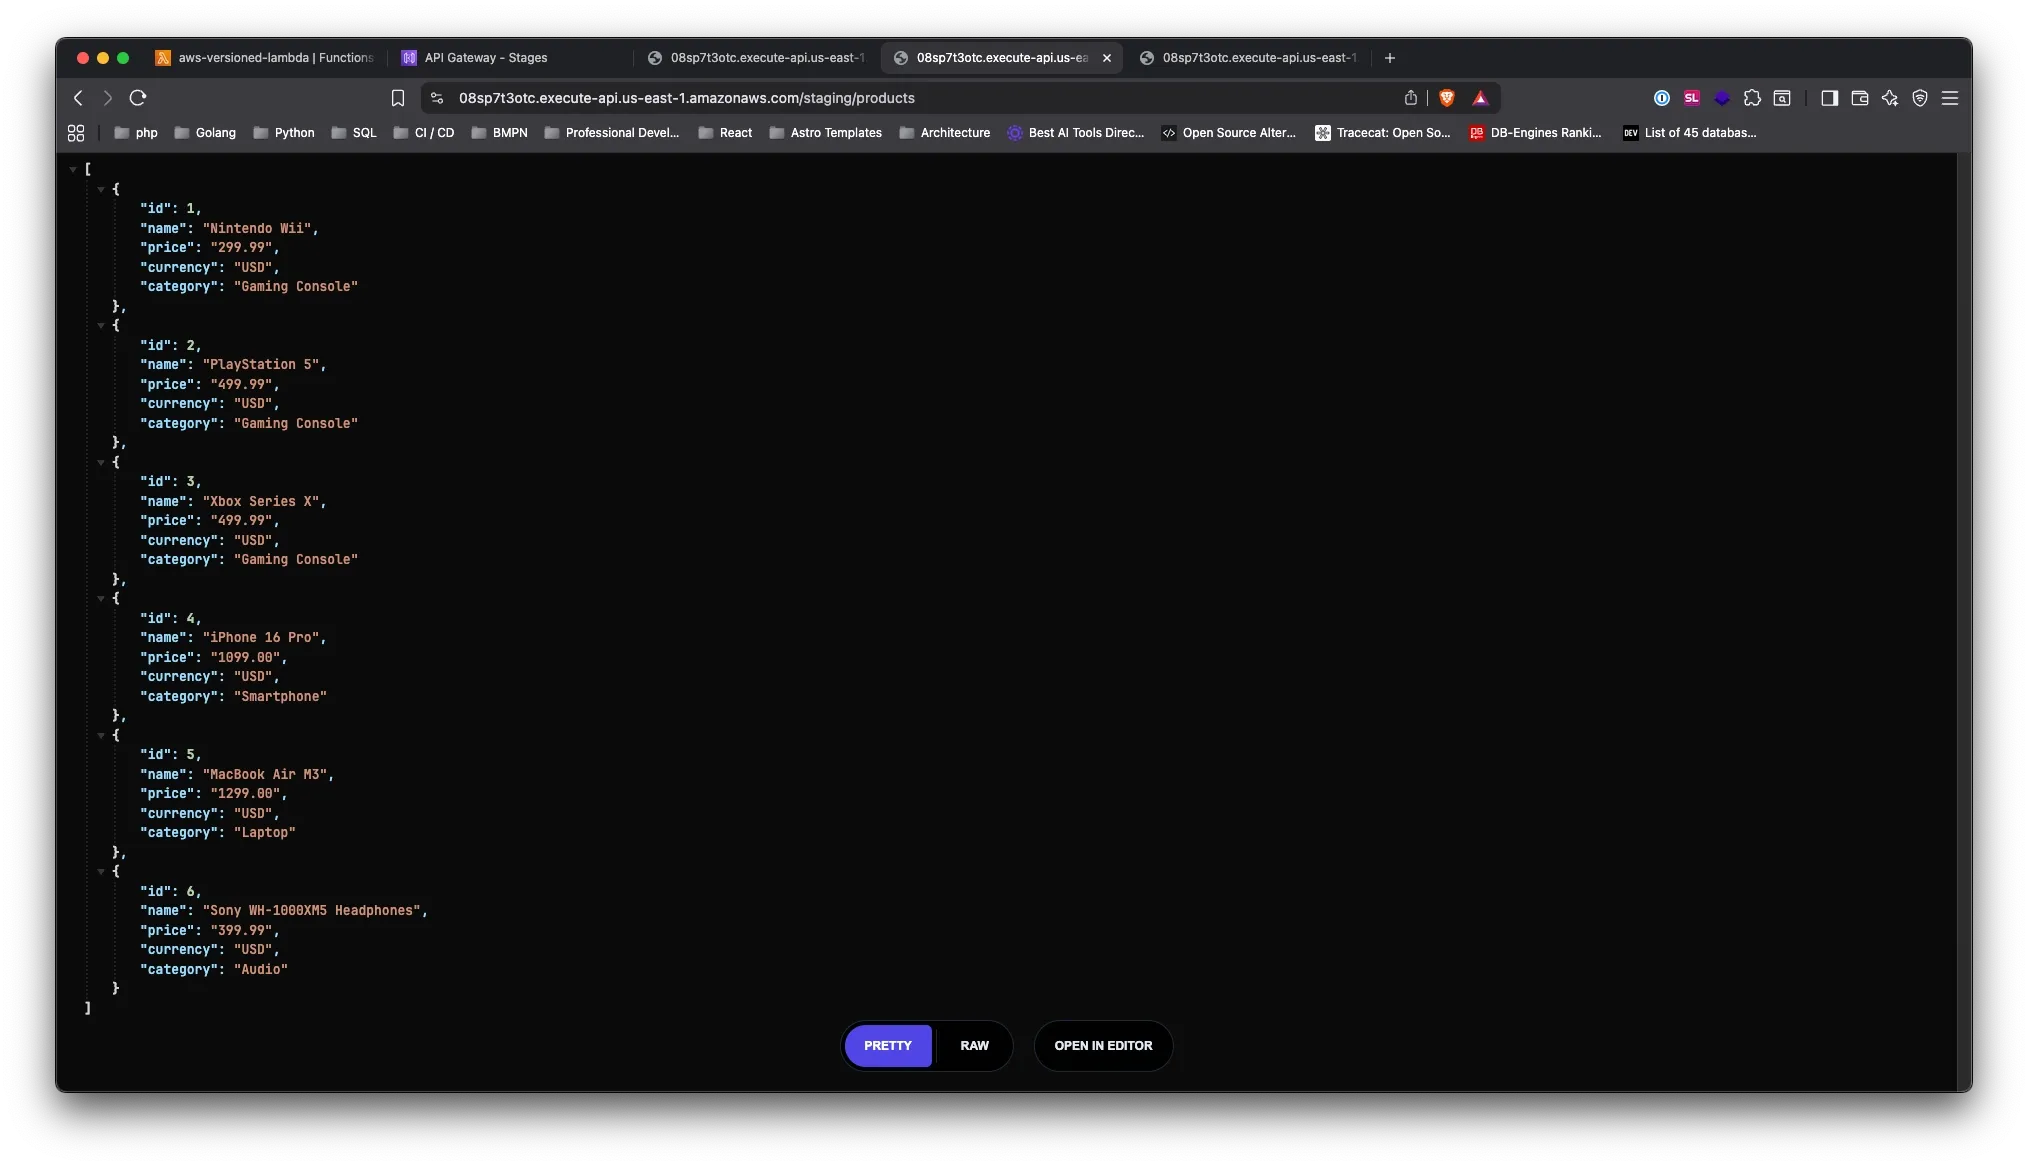
Now if we go to our staging URL, we’ll see that it returns a JSON with the data that was there previously. Everything runs smoothly!
Testing the Workflowh2
1. Make Changesh3
Update your Lambda function to add new properties to products. Changes appear instantly in the development environment!
2. Publish New Versionh3
Once tested, create a new version of your Lambda.
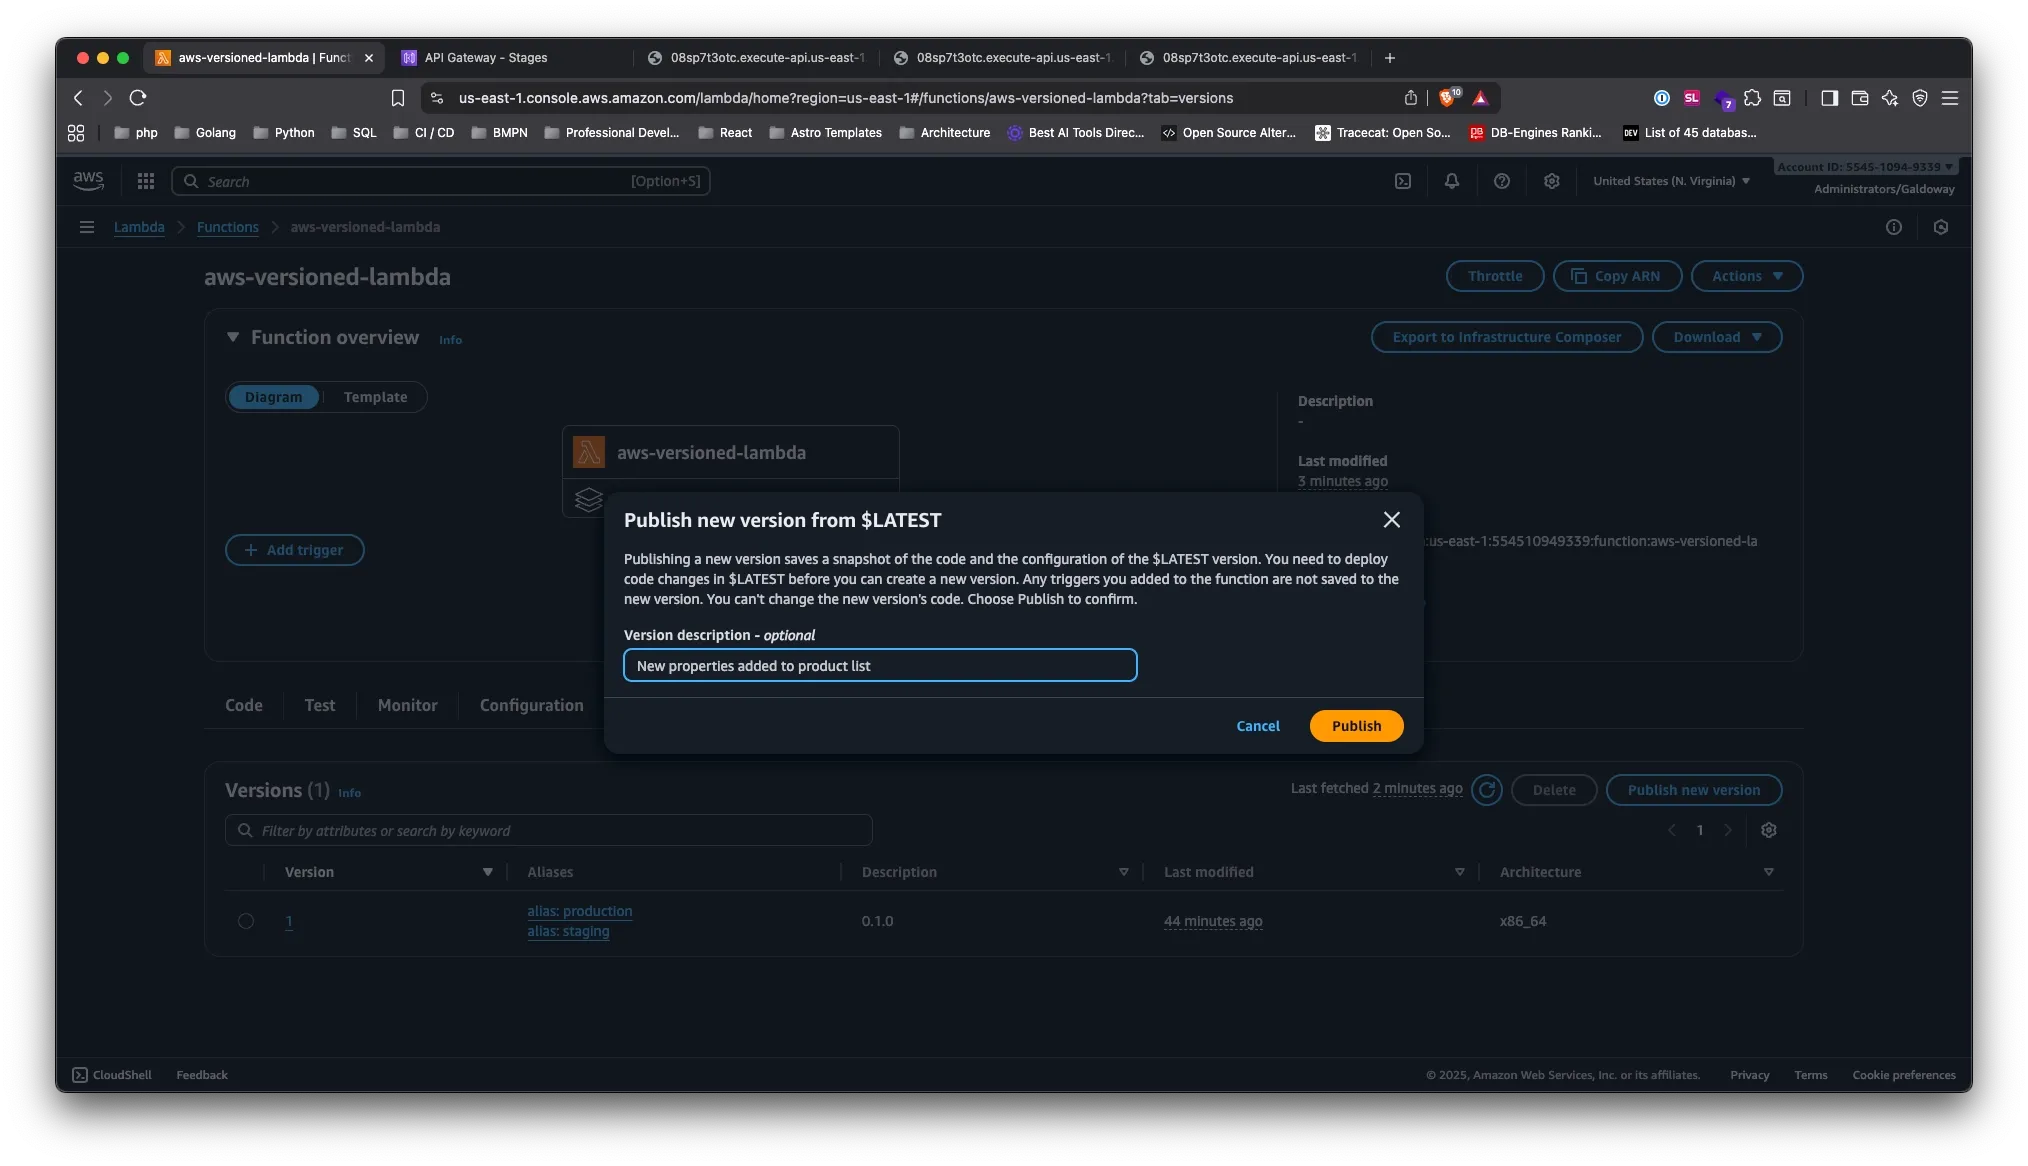
3. Update Stagingh3
Update the staging alias to point to your new version. Now staging has the new features while production stays unchanged!
Conclusionh2
And that’s it! With this setup, we’ve been able to create secure environments, version our Lambdas, and have our API Gateways make use of them. This allows you to make changes to your Lambdas without the fear of breaking production with the slightest change.
What we’ve accomplished:
- Safe development workflow: Changes go through dev → staging → production
- Version control: Each environment points to specific, tested versions
- Risk mitigation: Production stays stable while you iterate on new features
- Team collaboration: Development environment provides immediate feedback
Now you can confidently deploy updates, knowing that your production environment remains protected while you develop and test new features!
What’s Next?h2
In a future post, we could explore how to automate this entire process using GitHub Actions or any CI/CD tool, making the deployment pipeline even more streamlined and efficient.
Repository: https://github.com/galdoway/aws-versioned-lambda